Quick Start
The TL;DR
Follow these steps to immediately see what Dodgeball can do:
- If you don't already have an account, you'll need to contact support.
- Once you've validated your email and logged-in, you can find your public API key and private API key in the Developer Center under API Keys.
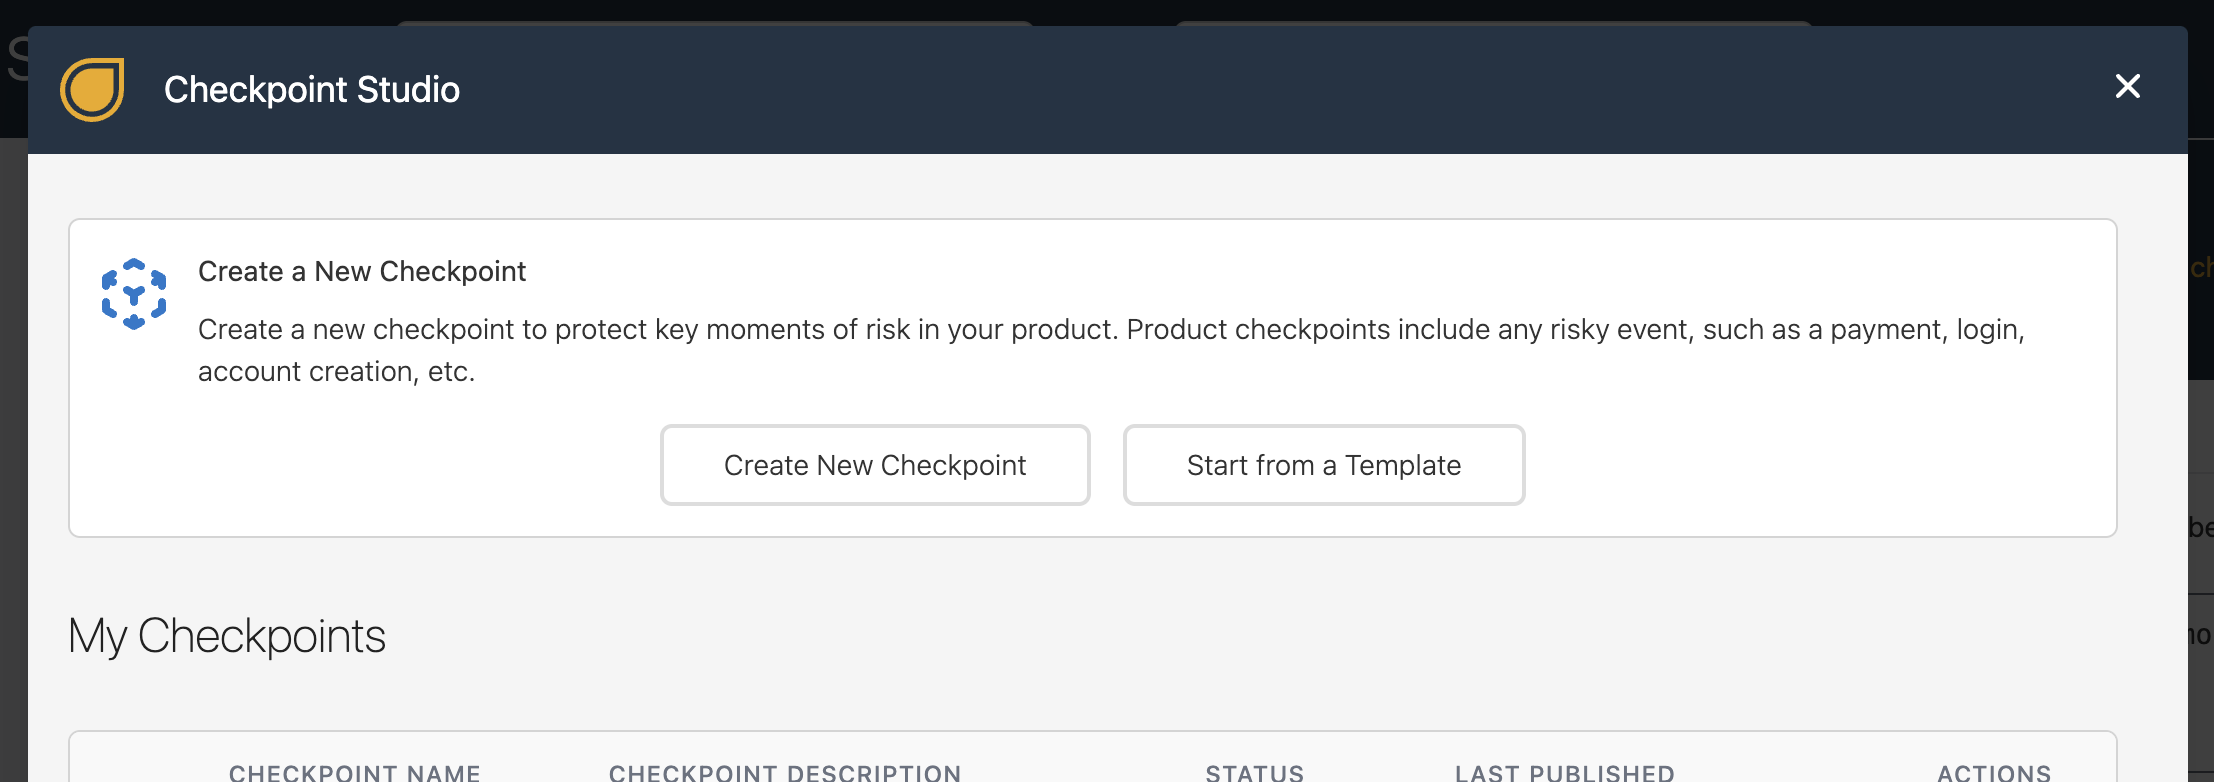
- Visit the Checkpoint Studio to create your first checkpoint.
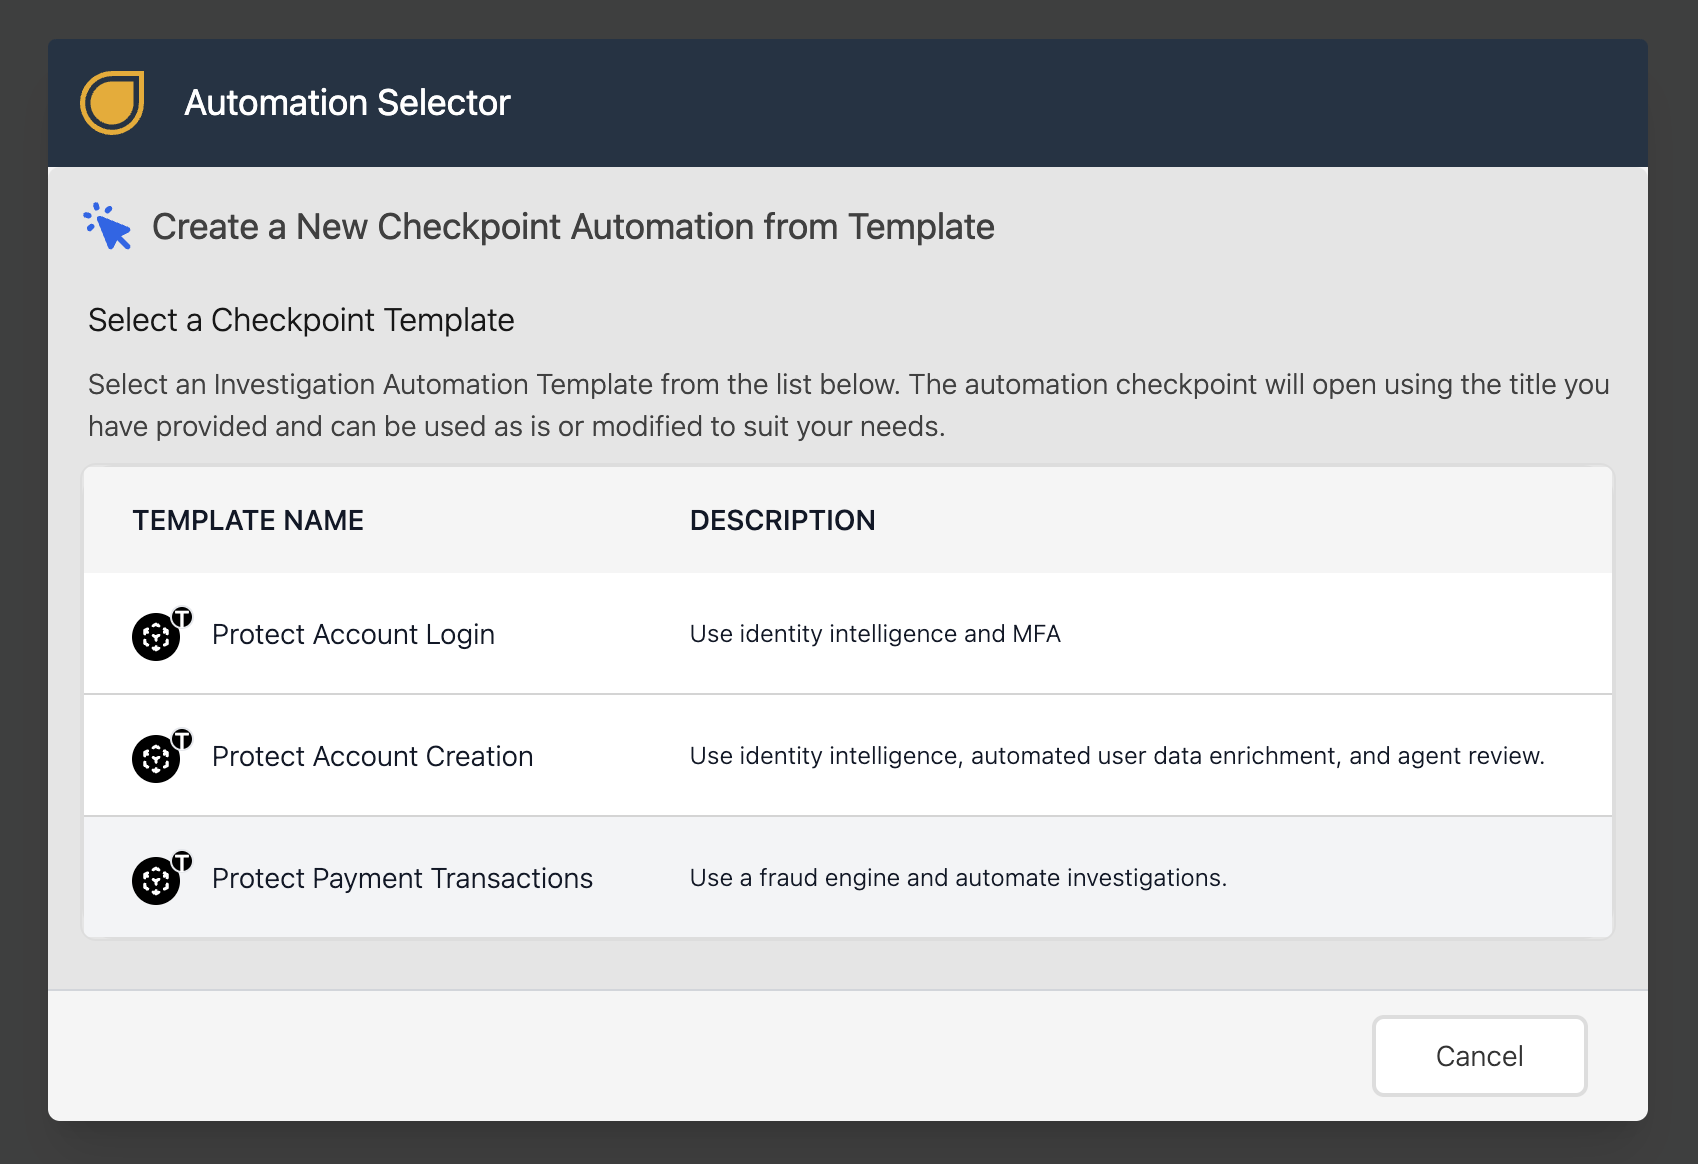
Click "Start from a Template":
Select the "Protect Payment Transactions" template:
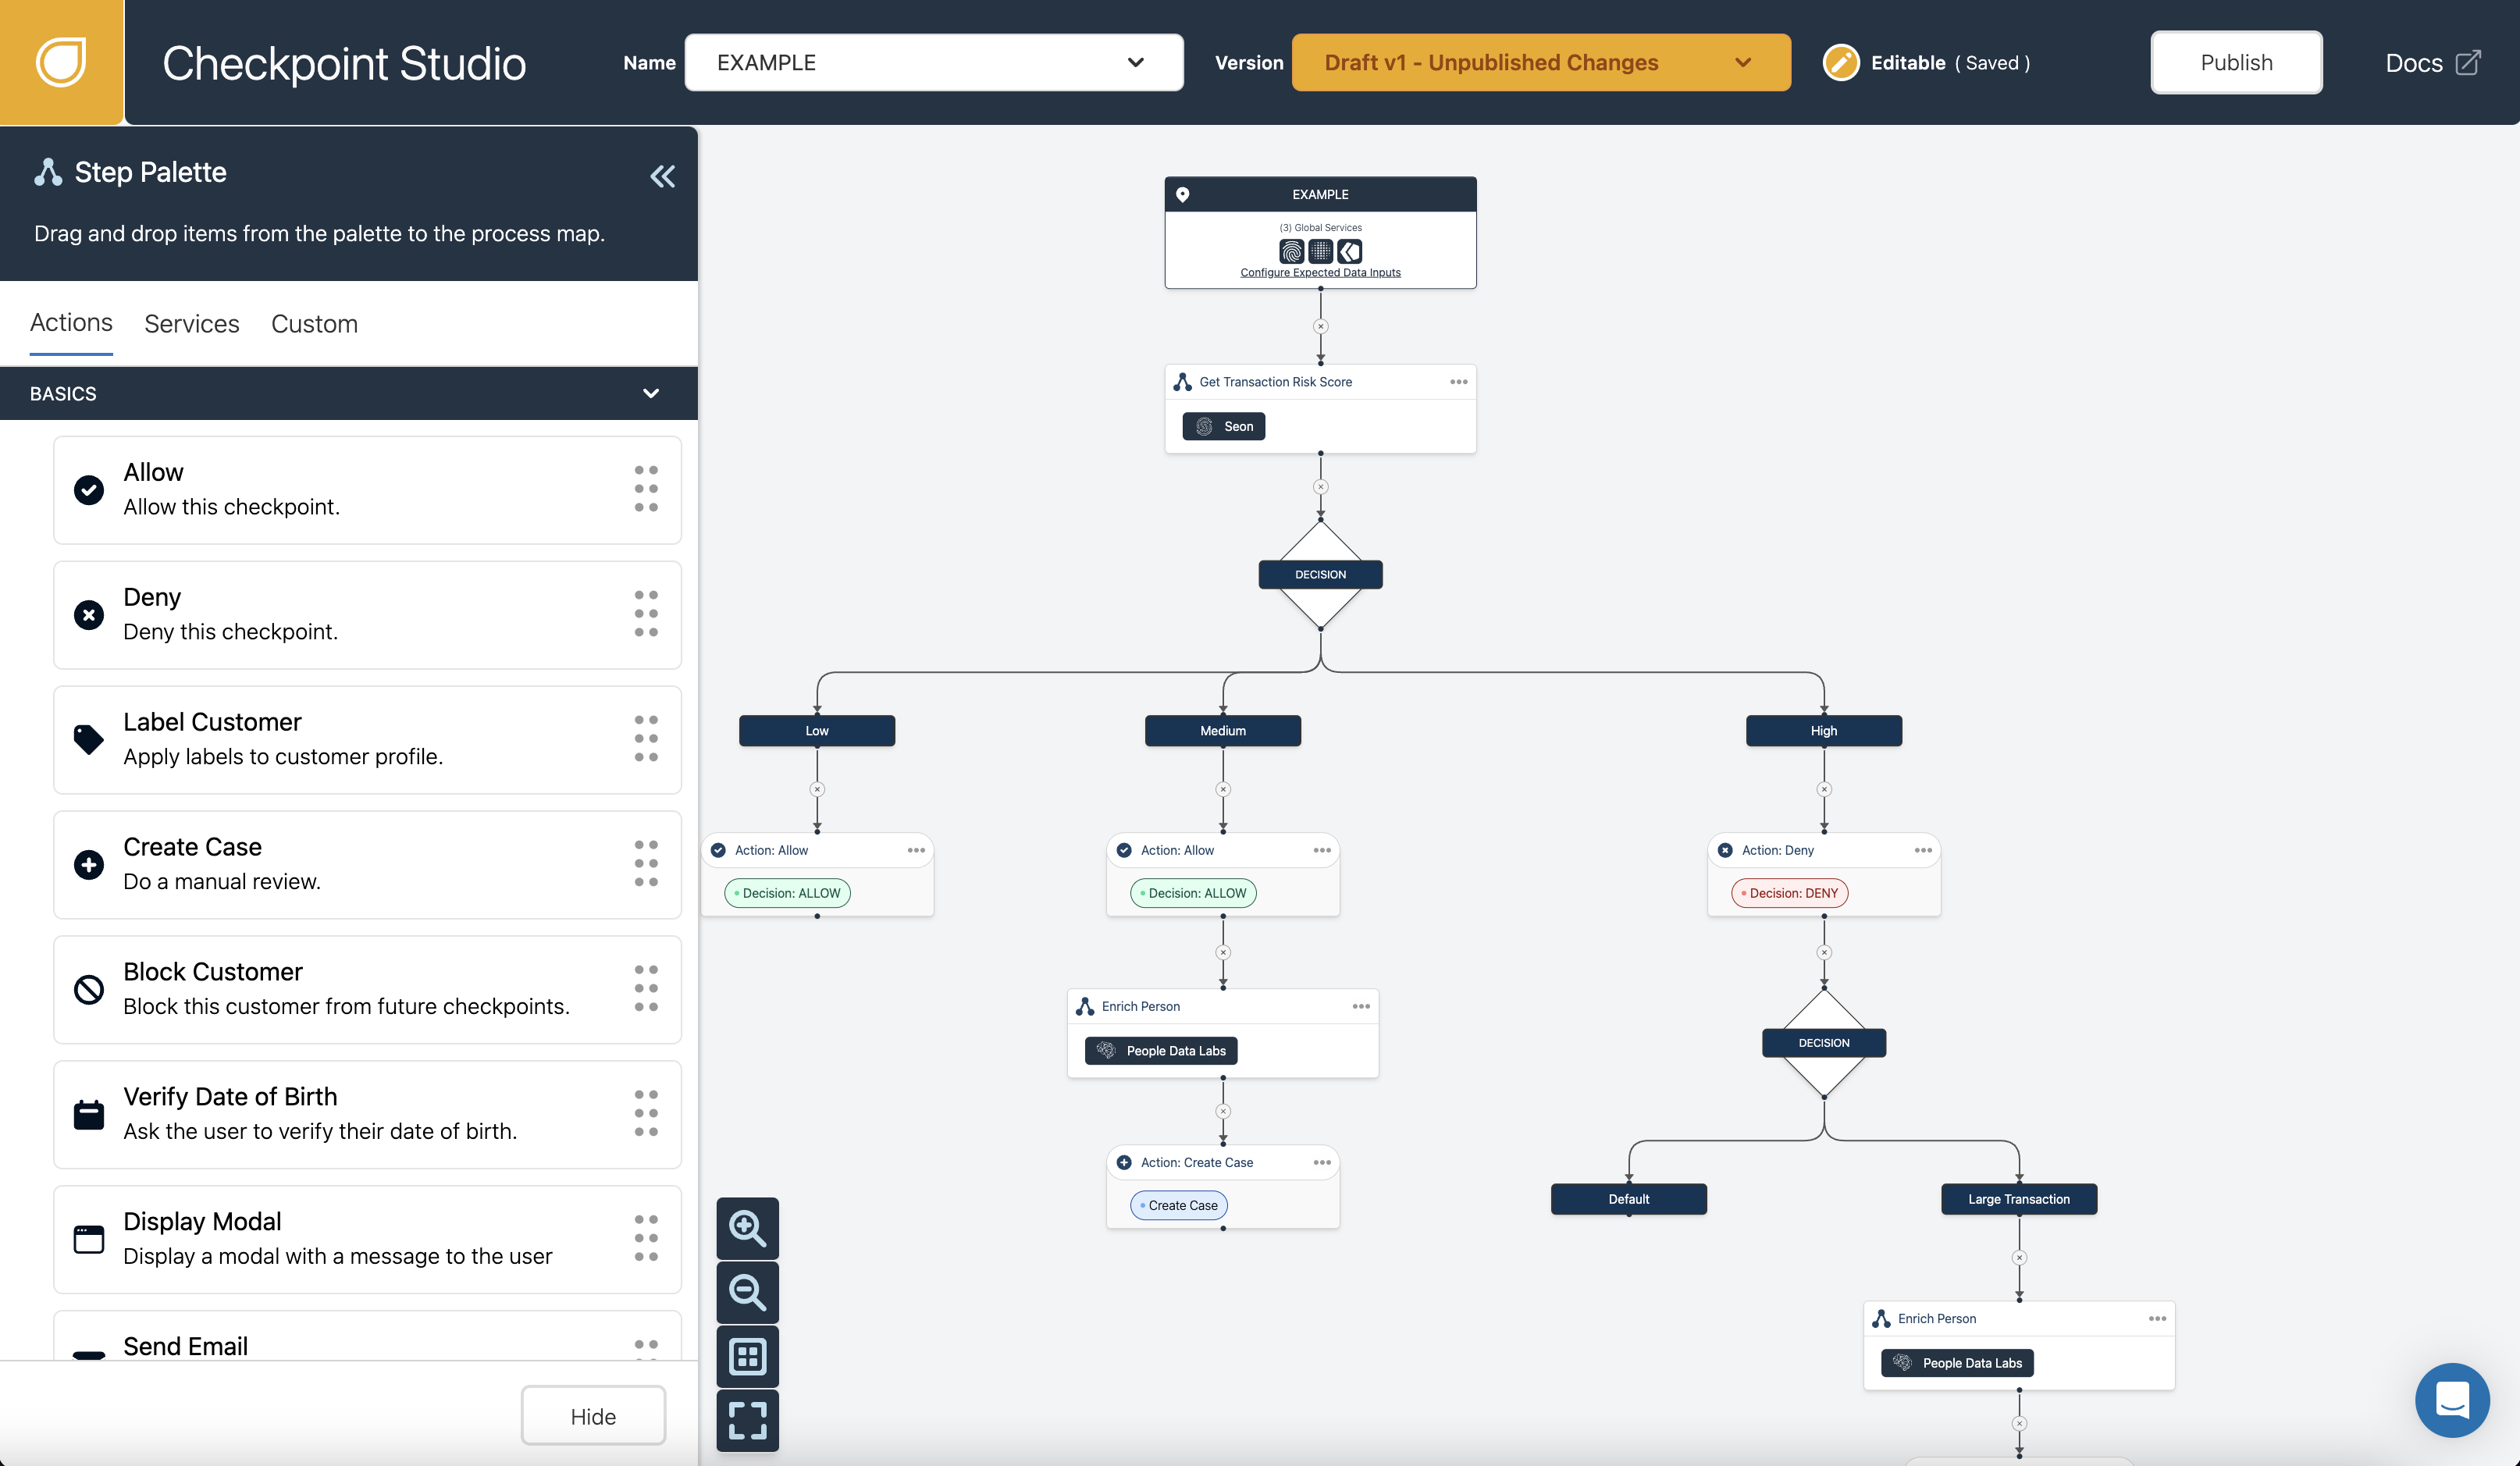
Then give your new checkpoint a name (e.g. EXAMPLE) and a short description:

Then click the "Publish" button in the top-right of the Checkpoint Studio to make your EXAMPLE checkpoint available for use:
To see the data your checkpoint expects to be submitted to it, click on the first step, which in this case the one that says EXAMPLE in its title:
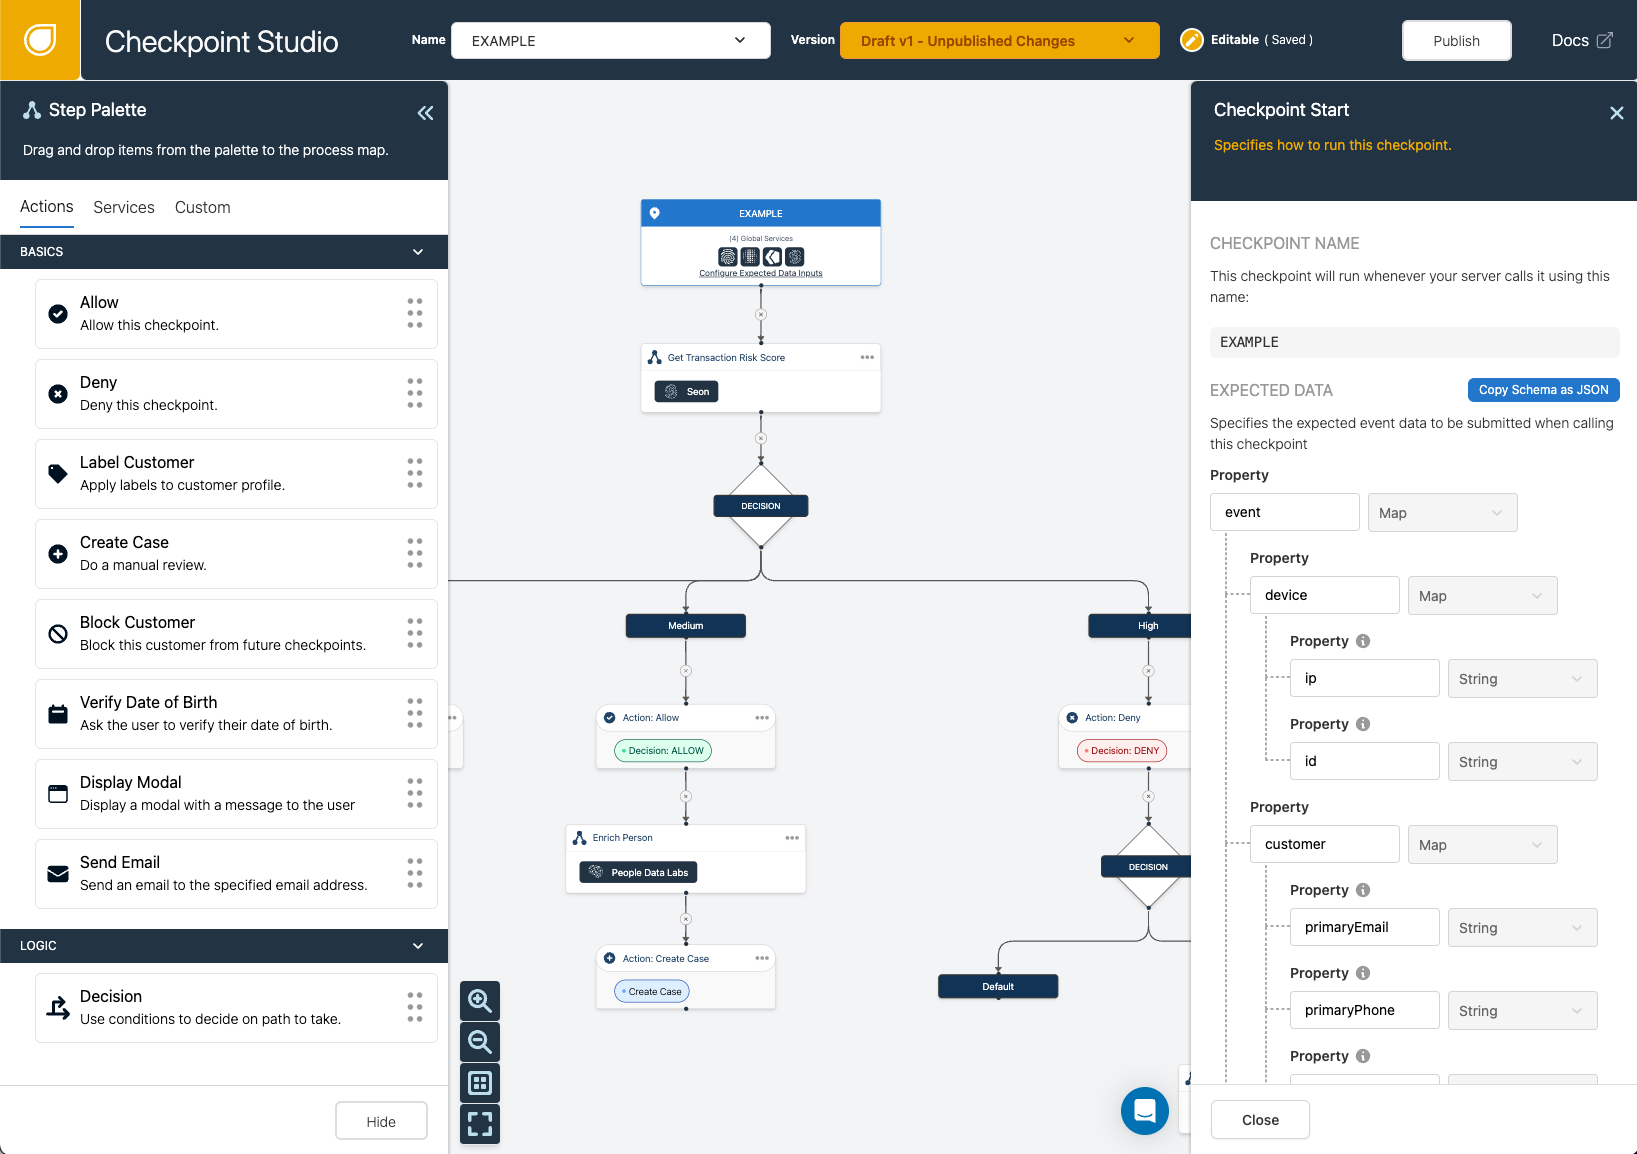
Dev Note: You can click on the
Copy Schema as JSONbutton to quickly export a data schema for the expected data inputs. This schema specifies for each property: whether or not it is required for the checkpoint to work, its data type, a description of what the property represents, and the expected data format.
- Call your checkpoint using one of our SDKs. Take a look at the dodgeball-examples repo to get you started. Here's a NodeJS example:
const dodgeball = new Dodgeball('your-secret-key');

const checkpointResponse = await dodgeball.checkpoint({
  checkpointName: 'EXAMPLE',
  event: {
    ip: '127.0.0.1',
    data: {
      // Customize to contain anything you want...
      // customer: {
      //   primaryEmail: '',
      //   firstName: '',
      //   lastName: '',
      // },
      // transaction: {
      //   amount: 100,
      //   currency: 'USD',
      // }
    }
  },
  sessionId: "session-abc-123...", // A unique identifier representing this user's activity. This sessionId should remain the same after the user authenticates
  userId: "user-def-456...", // (Optional) A unique identifier representing the account this user is attempting to or has already logged-in to
  sourceToken: "sourceToken-ghi-789", // (Optional) Obtained from the Dodgeball Client SDK, represents the device making the request
// other optional properties omitted
});
Dev Note: While you can submit any arbitrary data in the
dataproperty above, certain property names such ascustomerandtransactionhave special meaning within Dodgeball. To see the full list of properties see the available vocabulary list.
- Use the checkpoint response to inform your application how to proceed:
if (dodgeball.isAllowed(checkpointResponse)) {
  // Allow the request to proceed (e.g. process a payment, allow the login, etc.)
} else if (dodgeball.isDenied(checkpointResponse)) {
  // Reject the request. You can send back the verification to the fronted to display a rejection message.
  return checkpointResponse.verification;
}
- Run your checkpoint and check out the logs to see your checkpoint in action.
Great work! Now try making some changes to the decisions in your checkpoint, click the "Publish" button and see your changes in action.