Quick Start
If you follow these steps, you'll be able to start working with Dodgeball in minutes!
This guide is designed to help you get started quickly. Prior to a production deployment, we recommend consulting the detailed documentation for each SDK, and working with your Dodgeball representative to ensure that your integration is secure and optimized for your use case.
Prerequisites
Before you begin, you'll need to have a Dodgeball account. If you don't already have one, you can contact support at support@dodgeballhq.com
Configure your Dodgeball Console
Create an Empty Checkpoint
Follow the instructions here to create an empty checkpoint in the Dodgeball Console.
Remember what you named your checkpoint, as you'll need it soon!
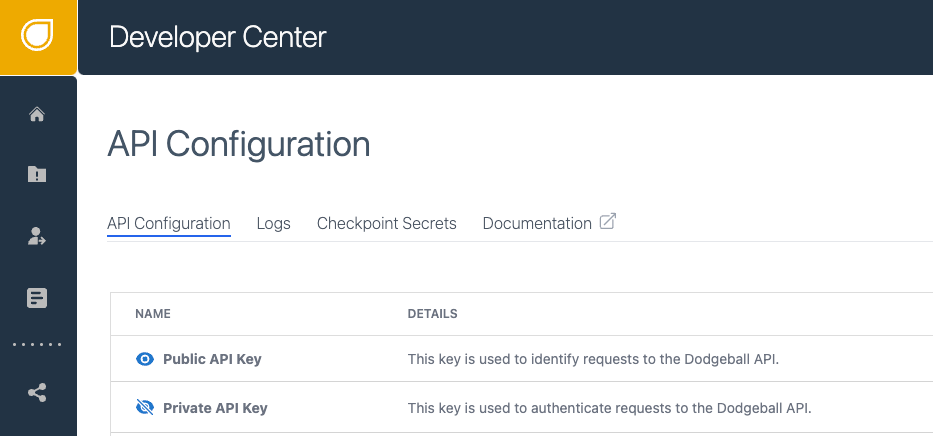
Find Your API Keys
Once you've logged-in to the Dodgeball Console, you can find your keys in the Developer Center under API Configuration.
Configure Dodgeball Examples
Setup Example Applications
Dodgeball provides a set of pre-configured example applications to help you get started quickly. These applications are designed to work with your API keys, and can be used to test your integration.
Example applications are available on our GitHub: https://github.com/dodgeballhq/dodgeball-examples
To get started go to the parent directory where you want to clone the repository and run the following command:
git clone https://github.com/dodgeballhq/dodgeball-examples.git
Once you've cloned the repository, navigate to the dodgeball-examples directory and follow the instructions in the README to get started.
Let's say you want to test a Vite + Typescript application frontend with a Node.js backend running an Express server.
Setup the Node.js Backend
- Navigate to the
server/node-tsdirectory - Setup your
.envfile with configuration per the Dodgeball ExamplesREADME.md - Run the startup commands per the Dodgeball Examples
README.md
Setup the Vite + Typescript Frontend
- Navigate to the
client/web-vite-typescriptdirectory - Setup your
.envfile with configuration per the Dodgeball ExamplesREADME.md - Run the startup commands per the Dodgeball Examples
README.md
Experiment with Example Functionality
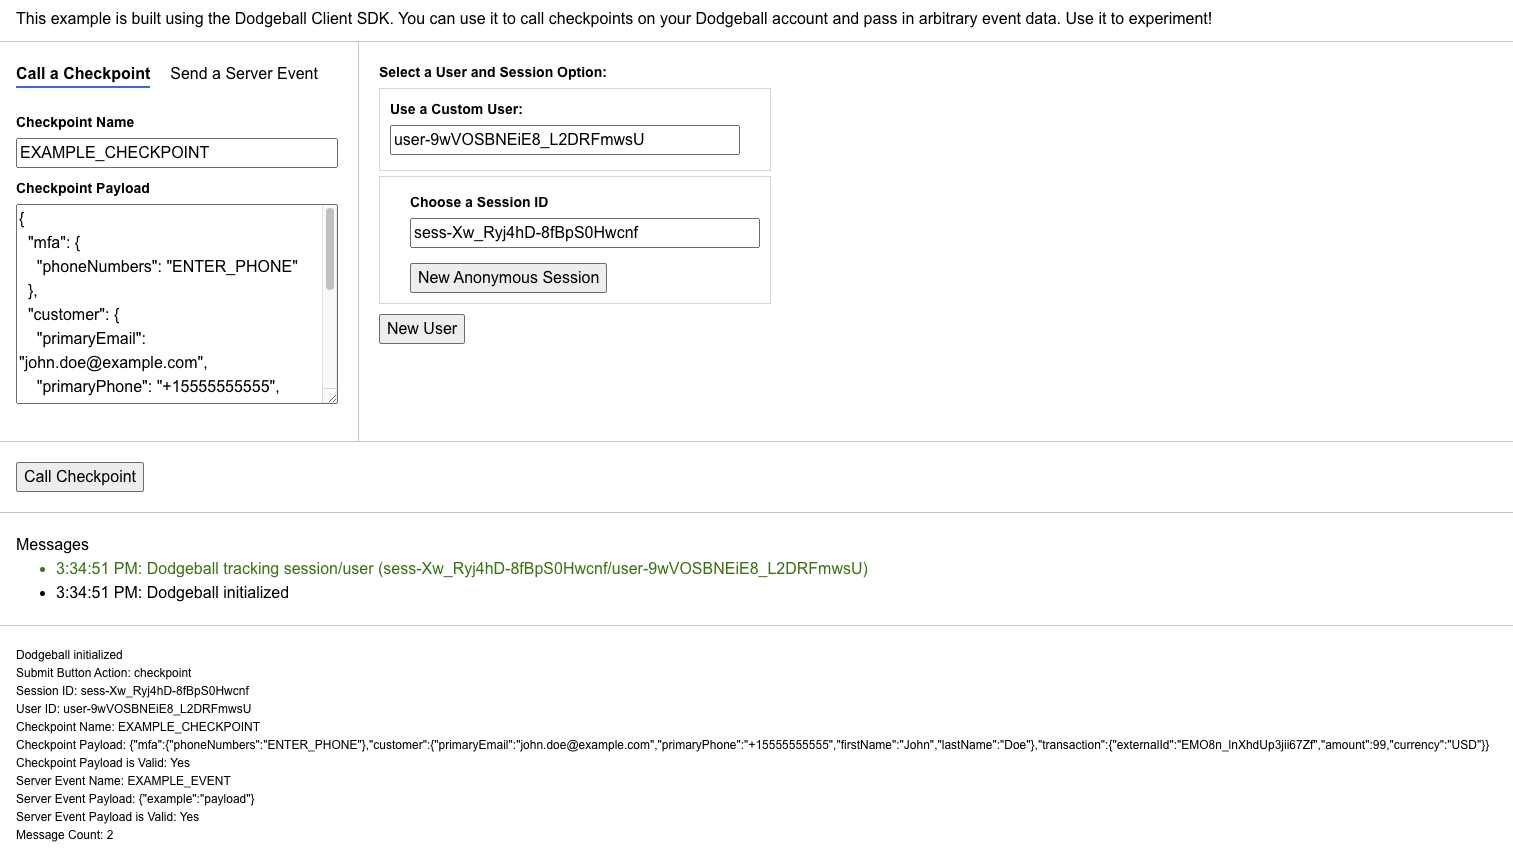
You now have a working example application that you can use to test your Dodgeball application - interactions between the frontend and backend are already configured to work with Dodgeball.
Navigate to your client application in your browser and interact with it to see how Dodgeball can protect your application.
Some actions you can take:
- Track users, sessions, and devices: See how Dodgeball tracks users, sessions, and devices. Depending on your account configuration, tracking may enable things like session replay, device fingerprinting, and more. The example application is configured to track whenever you change your user/session configuration.
- Call a Checkpoint: Enter the name of the checkpoint you created in the Dodgeball Console and see how the application responds with different payloads.
- Send a Server Event: Send a server event to your application and see how the application responds.
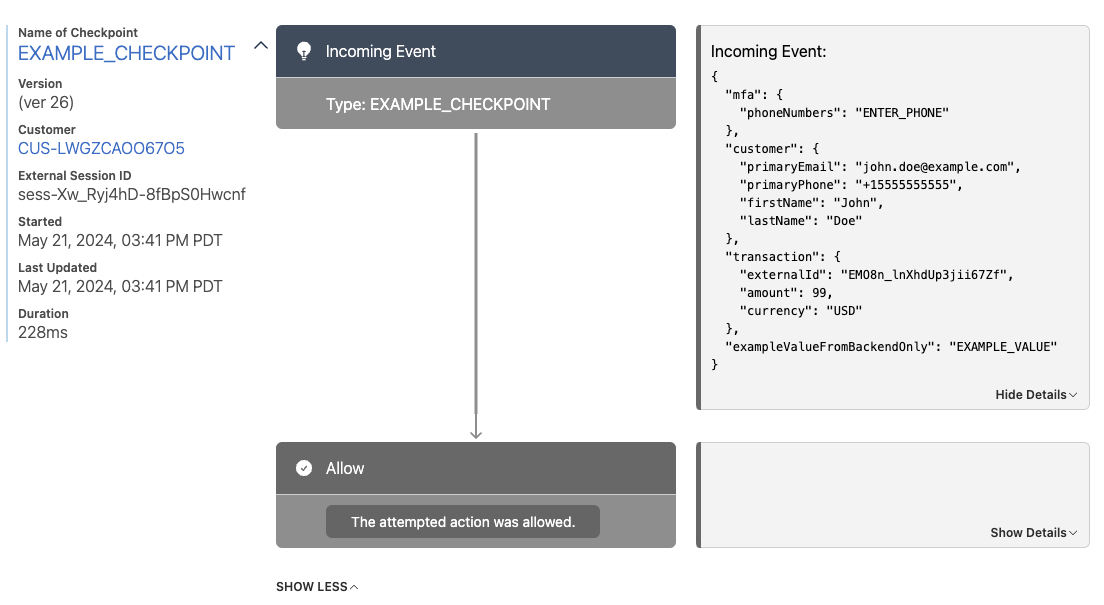
View Developer Logs
Once you have sent some checkpoints, you can view the logs in the Dodgeball Console. Navigate to the Developer Center > Checkpoint Logs to see the logs for your application.
Modify Checkpoints and start testing real workflow
Once you've successfully tested an empty workflow, you can start modifying your checkpoints to add logic to protect your example application.
A good starting point is to add something like an MFA step to your workflow. See Adding MFA to your Application for more information.
This is a useful example, because it demonstrates how multi-step workflows can be built using Dodgeball, and managed without having to touch your code.
Start the Integration Process with your real applications
When you're ready to start integrating Dodgeball with your real applications, you can follow the detailed instructions in the Developer Documentation.
The Dodgeball team is here to help you with any questions you have along the way.